Do you ever find yourself pinning photo after photo of gorgeous, Dutch masters inspired flower arrangements, only to have your mind go absolutely blank once you actually have the shears in hand? Yeah, me too. For years I’ve admired the floral stylings of all-stars like Floret and Milli Proust, and especially my real-life friends J and J Flower Co.. But I don’t have the time, training or tools to make that kind of magic happen. So instead, we’re going to talk about how to arrange garden flowers in a simple and easy way so you (and I) can enjoy them to their fullest.

Selecting your garden flowers
This may sound kind of silly, but the first step in creating beautiful bouquets that you really love is selecting flowers that go well together and with your home. After always being dissatisfied with my bouquets a few years ago, I realized that I had been planting really bright colored blooms- deep red dahlias and orange zinnias- that looked great in the garden, but shocking in my house. So I literally dug up my entire dahlia patch, gifted 95% of them and started over.
Now I choose to plant blooms that fall mainly in the same color palette, softer colors that typically go well together. That way, almost any flower I select from my garden can be paired together for a winning combination. Plus it gives me a lot of choices when it comes to harvest time. Here are the colors I try to stick with:
- Pinks + purples
- Corals
- Creams + whites
- Creamy yellows + peaches
- Purples + blues
While might still plant a few, more saturated colors- like yellow sunflowers- in the garden, I typically don’t select them for bouquets.

Plant bouquet filler
One of the things I learned from my friends at J and J Flower Co. is how important it is to plant good bouquet filler. Bouquet fillers are things like greenery, smaller flowers, herbs, grasses and foliage. Here are a few things bouquet fillers do for your bouquet:
- Add structure. Ever stick a beautiful garden bloom like an English rose in your mason jar, only to have it droop sadly over the edge of the glass? That’s where sturdier fillers can help. Items with more structure and rigidity can support those more spindly flowers, as well as give shape and dimension to your arrangement.
- Balance colors and add depth. Often I will use a filler to bridge the gap between two colors of feature flowers. For example, tying a pink rose and peach dahlia together with some light greenish-pink seed pods.
- Provide a background for the bigger flowers. The reason flowers so often look prettier in the garden is because of all the background foliage. Make sure your bouquets have the same effect with the right amount of greenery.
- Create space and a more natural look. Fillers also help provide proper spacing between the bigger, showier flowers as well as giving that straight from the garden look. Bouquets with good filler look effortless and natural.

Ideas for bouquet fillers
But what kind of bouquet fillers do I plant for making beautiful garden bouquets? Good question! Here’s a few of my favorites:
Yarrow. Yarrow is a small, lacy flower that grows in bunches. It comes in really lovely dusty colors and is perfect bouquet filler. It is also a self-seeder and comes back year after year.
Catmint. Catmint or Nepeta has spindly branches with tiny lavender colored flowers. It adds such a nice accent to summer flowers, dahlias and roses in particular.
Eucalyptus. I prefer the leafy varieties of eucalyptus for filler versus the more woody stemmed version. Easy to grow but also easy to find at a grocery store (esp. Trader Joes), this filler is extremely versatile and even pretty on its own.
Seed Pods. Especially as you head into autumn, the dried seeds pods in your garden (also, rose hips!) can be lovely in arrangements.
Lavender. Little sprigs of lavender always add cheer and beautiful, peaceful smells to bouquets. I feel like they lend an especially farm-y element to a bunch of blooms.
Statice. This one was new to me a few years ago, but it’s SO GOOD. With small, papery blooms on the end of stems that almost look like pipe cleaner, they add such a great texture to a bouquet. They also come in really beautiful dusty colors and are now a staple in my garden.
Sage. The minty color of the herb sage is such a nice addition to any flower bunch, it adds such a softness to creams and whites, especially.

Choosing garden flowers to feature
I have a very simple strategy when it comes to selecting garden flowers to feature: I pick what’s in season. Groundbreaking, right? But seriously, if it’s Spring, I’m using roses or peonies. Summer, sunflowers or dahlias. Fall, still dahlias, but with more dried elements. Winter, hellebores and greenery. Basically whatever is blooming in your garden and has a larger size, can be chosen as your feature flower.
Secondary flowers
Secondary flowers are another important element in a good bouquet. While a typical bouquet mason jar style can only boast a few larger blooms, tucking in some supporting secondary flowers really adds dimension to the arrangement. A few favorite secondary flowers of mine are:
- Smaller zinnias
- Hydrangeas
- Snapdragons
- Small, button-style dahlias
- Stock
- Gomphrena
- Strawflower
Tools you need to arrange garden flowers
A good pair of shears. While I typically clip out in the garden with gardening shears or clippers, when I’m arranging indoors I use my Japanese Floral Shears. Not only are they extremely sharp (cut myself more than once) they look beautiful hanging on my pot rack so I can easily grab them when needed.
Quart-size wide-mouth Mason jars. Sure there are lots of beautiful vessels out there, but the one I come back to time and time again is the mason jar. With fresh, thirsty farm fresh flowers, the deeper jars hold more water, I always have them on hand, and they provide enough weight so your arrangement doesn’t tip over. They’re also easy to transport in the car if you’re gifting flowers to a friend.


Steps to making a bouquet with garden flowers
I like to keep it simple. Here are the steps I follow when putting together a garden bouquet.
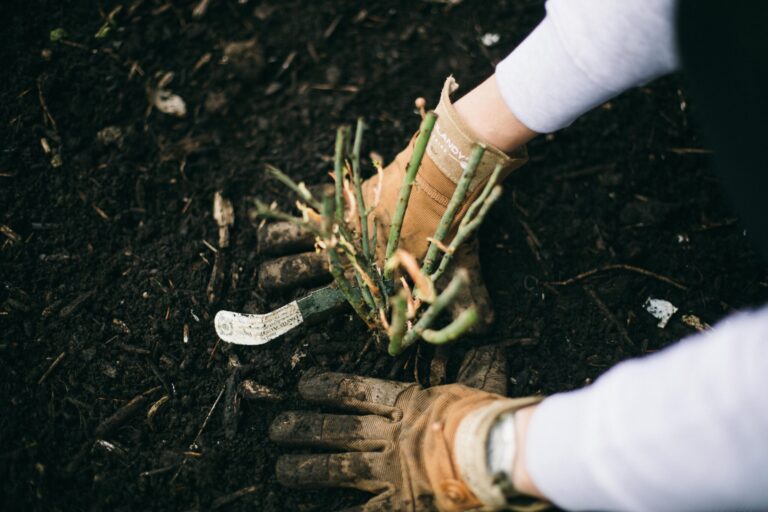
- When cutting your stems in the garden, cut them as long as you possibly can. It’s easy to trim, impossible to lengthen. Stick them in a bucket of water while you continue to gather. I try to cut flowers when it’s cooler- morning or evening.
- Lay everything out flat on the table or counter where you can see it. It helps you identify right away what will look nice together. Strip all any leaves or foliage that will hit below your vessel’s water line.
- Select your feature flowers. Cut them to the right size- I shoot for about 2-3 inches above the rim of the jar- and bunch them together in your hand.
- Add secondary flowers (smaller blooms) and filler into your hand, moving things around until they look balanced. I try to have the wispier bits hit up above the feature flowers to add some whimsy, so don’t trim those until you get them where you want them.
- Trim your stems to all the same length and add to your jar that’s been filled with water. At this point you’ll have to rearrange things a little bit to make sure they look right in the jar, fill in where needed, and adjust the height of any stems that might be too tall.
- Voila! A simple, rustic bouquet from garden flowers. Perfect for gifting or enjoying on your kitchen table!
Share your tips and tricks!
Do you have favorite flowers to use in bouquets? What are your go-to vessels? Leave a comment below with your bouquet making wisdom and pin this image to remember these tips and tricks.